
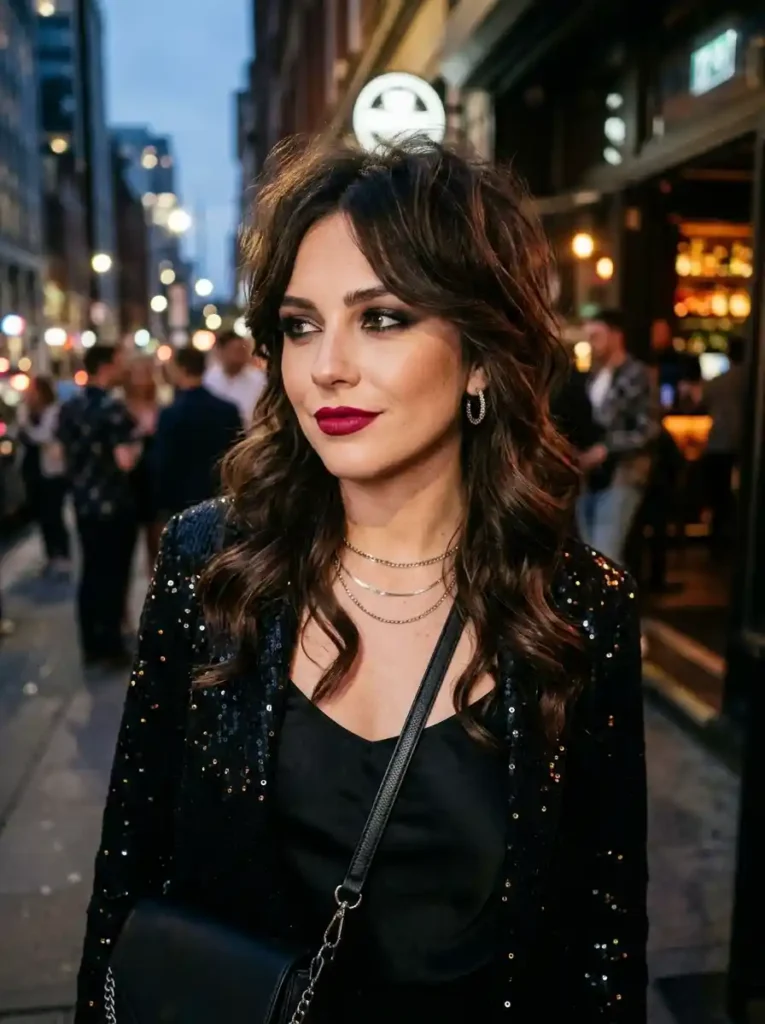
You have been staring at the same Wolf Cut Tutorial for two years. It is fine. It behaves. It requires zero thought and produces zero excitement. Then you stumble across a video of someone shaking out the most gloriously chaotic, textured, layered haircut you have ever seen — all choppy ends and wild volume and that specific kind of effortless dishevelment that takes genuine skill to create. You rewatch it four times. You save it. You show it to three friends. And every single one of them says the same thing: “That is a wolf cut.” The wolf cut is the haircut that happened when the shag met the mullet and both decided to become something genuinely, unapologetically better than either had been before.
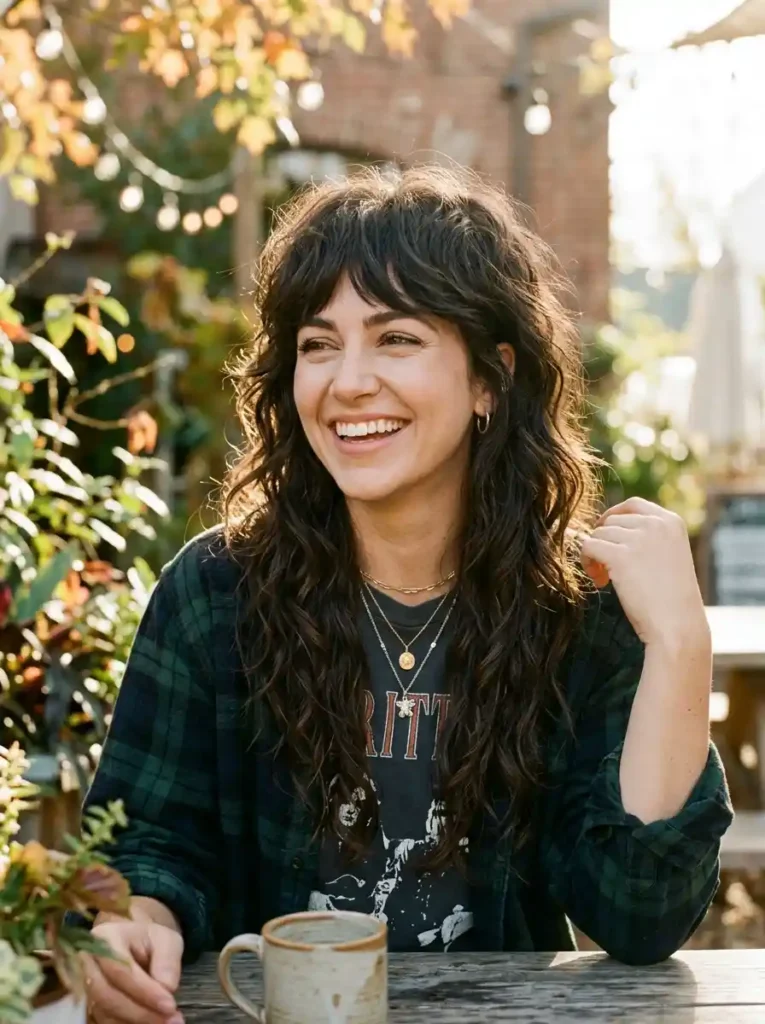
The wolf cut’s defining characteristic is its extreme layering — the dramatic disconnection between short, choppy crown layers and longer, flowing lengths creates a silhouette of such specific textural energy and such genuine bold character that it generates more immediate visual excitement than almost any other haircut available. It works on straight hair. It works on wavy hair. It works on curly hair, short hair, long hair, and every color from platinum to jet black. What makes the wolf cut genuinely accessible to most people is that its organic, slightly disheveled quality means it is more forgiving of minor imperfections than precision cuts — and it looks genuinely better after a few weeks of growth than it does on the day it is cut. These twenty-four ideas cover every version of the wolf cut available, with practical styling guidance for each.
1. The Classic Wolf Cut on Long Dark Hair

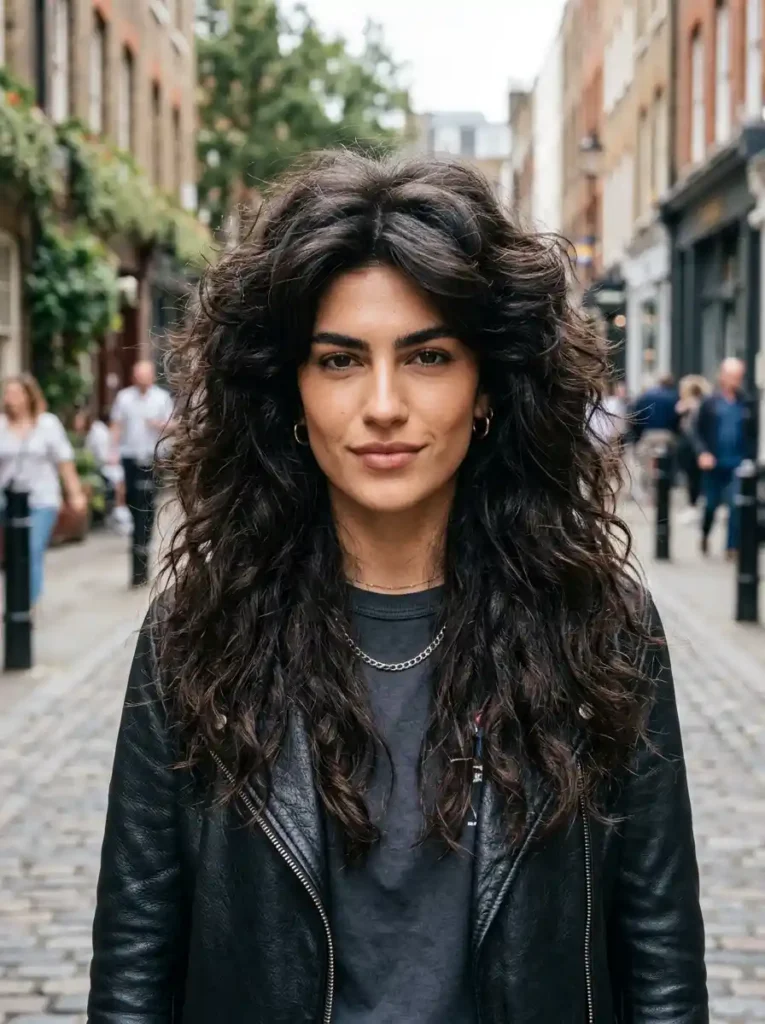
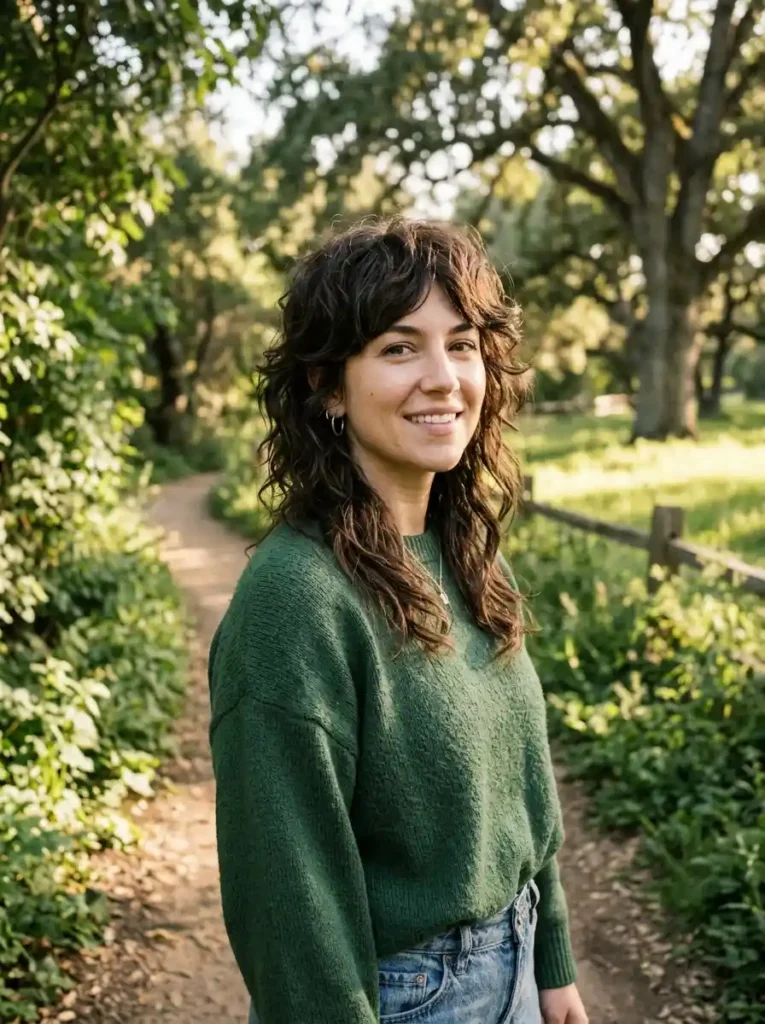
The classic wolf cut on long dark hair is the most dramatically impressive and the most immediately recognizable wolf cut expression available — the extreme contrast between the short choppy crown layers falling to approximately chin level and the long flowing lengths falling to mid-back creating a silhouette of such extraordinary textural contrast and such complete visual energy that it generates genuine, sustained admiration from everyone who encounters it. Natural waves or waves created with a diffuser amplify the layered disconnection beautifully, making every individual layer visible and every section of the cut’s structure apparent as a deliberate, beautiful design decision.
Styling the classic long dark wolf cut requires understanding the specific role that volume plays in the result’s success. The crown layers need to be lifted and separated rather than flattened by heavy products or heat styling that pushes the hair down. Apply a texturizing spray or mousse to damp hair at the root of the crown sections before diffuse drying with your head tilted forward, which builds volume at the crown that the wolf cut’s short layers need to create their signature high-volume silhouette. Finish with a texturizing spray through the lengths for piece separation that makes every layer visible and every structural element of the cut clear.
2. The Short Wolf Cut Pixie Version
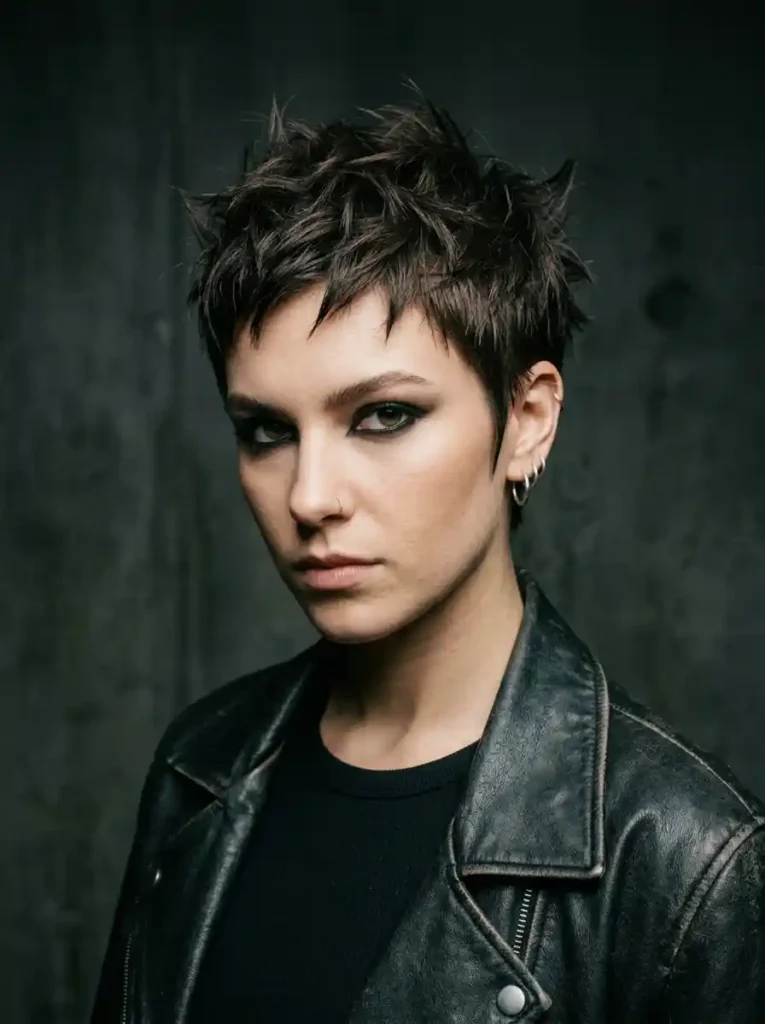
A short wolf cut at pixie length creates the most texturally intense and the most structurally dramatic wolf cut variation available — the extreme disconnection between two to three centimeter crown sections and the slightly longer nape and side lengths creating the wolf cut’s signature structural contrast within an extremely compact format that communicates maximum personal boldness at minimum hair length. The short wolf cut is for people who want the wolf cut’s specific textural energy without any of the maintenance that longer hair lengths require, and who are prepared to commit fully to the most visible and the most unambiguous personal style statement available.
Styling a short wolf cut requires significantly less product and significantly less time than longer versions — a small amount of pomade or wax worked through the crown sections with the fingertips creates the specific directional texture and the deliberate piece separation that makes the short wolf cut look intentionally artful rather than simply unkempt. Work the product from root to tip through the crown sections in different directions simultaneously to create the multi-directional texture that the wolf cut requires. Air drying is perfectly acceptable for short wolf cuts and often creates better results than heat styling because it preserves the natural movement and the natural direction that the cut creates.
3. The Wolf Cut on Curly Hair
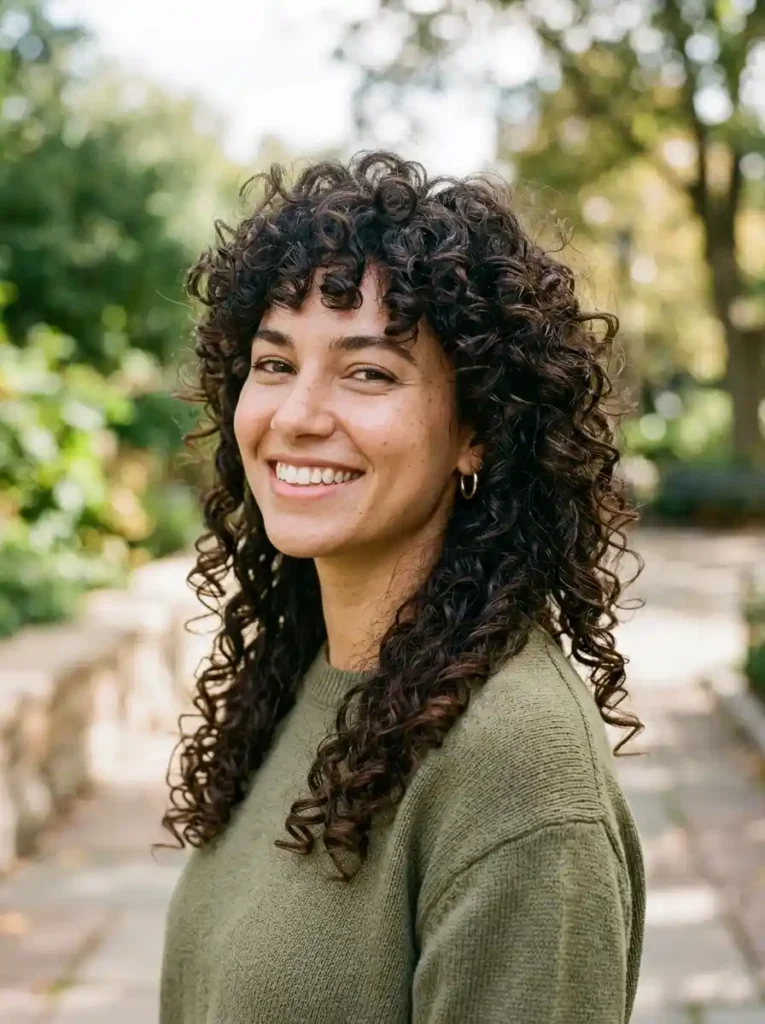
A wolf cut on naturally curly hair creates the most volumetrically extraordinary and the most genuinely curl-celebrating haircut result available — the extreme layering removing the weight that flattens and elongates naturally curly hair and replacing it with the specific structural lightness that allows curls to form their most beautiful and their most voluminous natural pattern. The short crown layers on curly hair create a magnificent halo of tight curl texture at the top of the head while the longer undone lengths below display the curl’s natural elongation pattern, creating a haircut of extraordinary dimensional beauty that flatters curly hair more completely than any single-length or minimally layered approach.
The specific styling routine that creates the most beautiful curly wolf cut result uses the curly girl method’s core techniques applied to the wolf cut’s specific structural requirements. Apply a generous amount of curl cream or curl defining gel through soaking wet hair from root to tip through all sections, then scrunch upward through the lengths to encourage curl formation. Diffuse dry with the hair flipped forward over the diffuser cup to build maximum crown volume, then gently flip back and continue diffusing the lengths. Scrunch out any gel cast with a small amount of curl oil once completely dry to reveal soft, defined, voluminous curls that fully express the wolf cut’s extraordinary structural ambition.
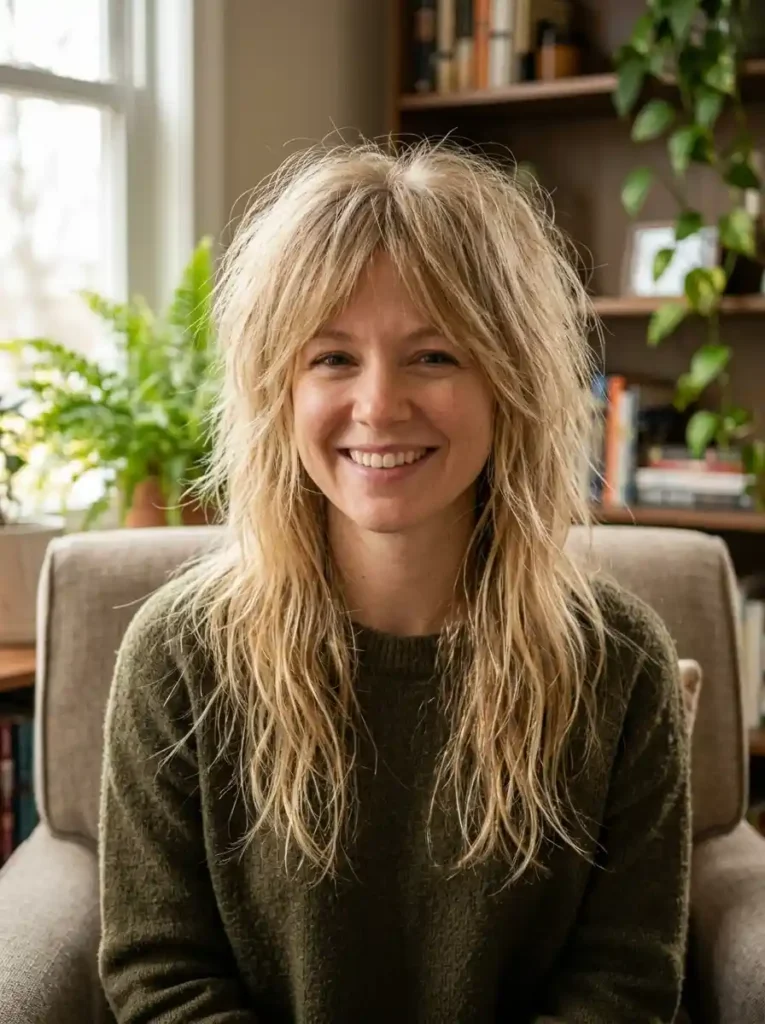
4. The Blonde Wolf Cut
Golden blonde hair amplifies the wolf cut’s textural energy with extraordinary warmth and visual richness — the tonal variation between the lightest exposed crown tips and the slightly deeper blonde through the longer lengths creating color dimension that makes every individual layer of the wolf cut’s structure visually distinct and individually beautiful. Blonde wolf cuts photograph with particular brilliance in warm natural light because the golden tones create the most luminous and the most warmly beautiful interaction with sunlight available in any hair color, making the layered structure appear to glow from within when the sun catches each individual layer.
Maintaining the textural energy of a blonde wolf cut’s styling requires product choices that add separation and definition without adding weight that flattens the crown’s short layers. A light sea salt spray applied to damp hair throughout all sections before diffuse drying creates natural-looking wave texture and piece separation that enhances the wolf cut’s inherent structural drama without the heaviness that styling creams or serums can introduce. Follow with a small amount of lightweight oil worked through the dry ends only — specifically avoiding the root and crown sections — to add shine to the lengths while preserving the root volume that the wolf cut requires.
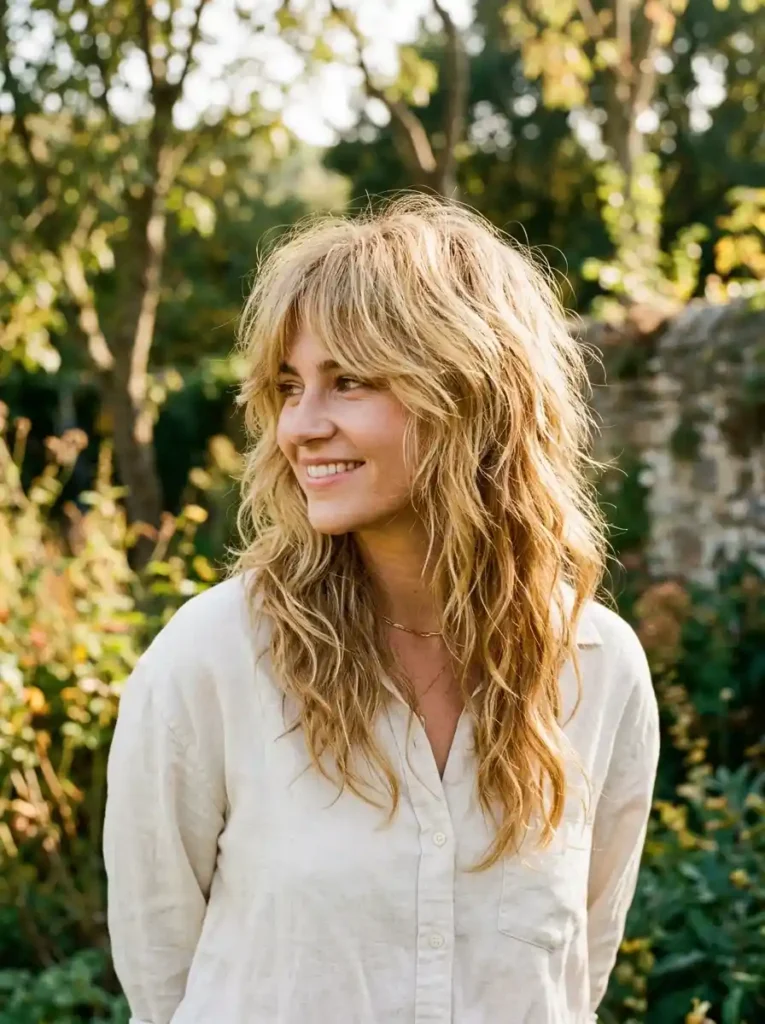
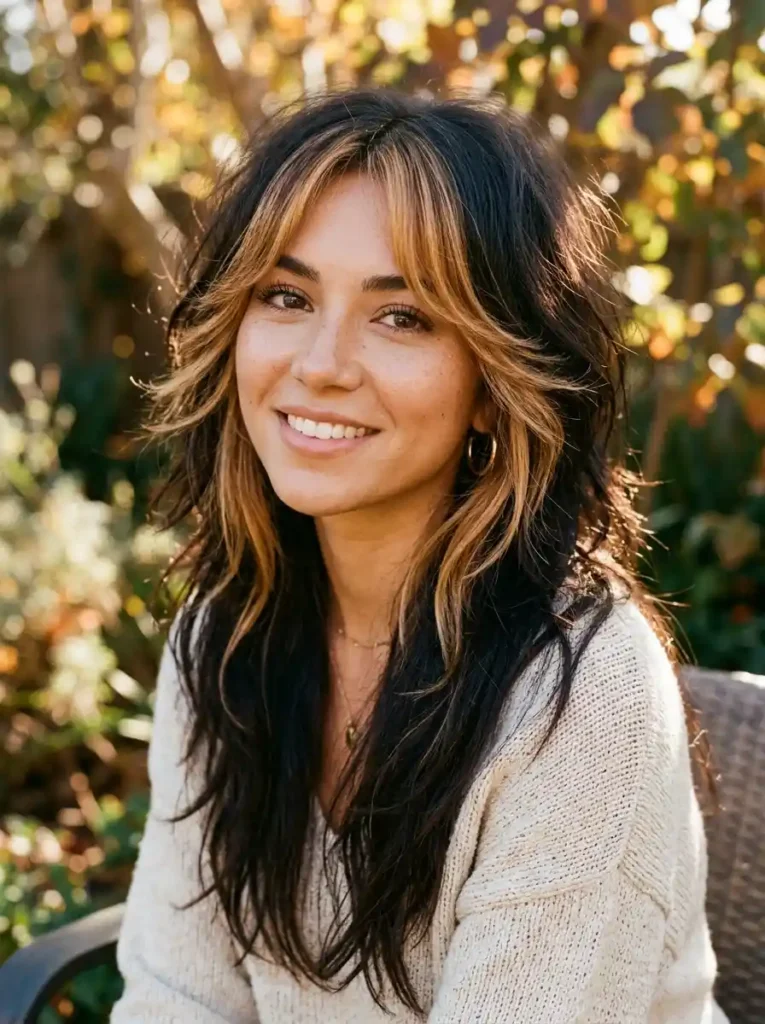
5. The Wolf Cut With Curtain Bangs

The wolf cut with curtain bangs is the most complete and the most broadly flattering version of the wolf cut available — the soft center-parted curtain bangs adding a face-framing element that the basic wolf cut structure lacks, while the wolf cut’s extreme layering adds the textural volume and crown drama that curtain bangs alone cannot create. The combination creates a haircut that frames the face beautifully at every angle while delivering the full textural energy and structural boldness that makes the wolf cut genuinely exciting rather than simply layered. This is the wolf cut variation consistently recommended by stylists for clients who want the most flattering possible version.
The curtain bangs should ideally be razor-cut at the edges rather than scissor-blunt to create the specific wispy, feathered quality that makes them fall naturally and beautifully rather than requiring daily precision blow-drying to maintain their shape. Ask your stylist to cut the bangs as an integrated part of the wolf cut’s overall layering rather than as a separate element, ensuring that the bangs’ length and texture feel continuous with the face-framing layers rather than obviously added. Style the curtain bangs by applying a small amount of lightweight mousse through damp bangs and allowing them to air dry around your face naturally.
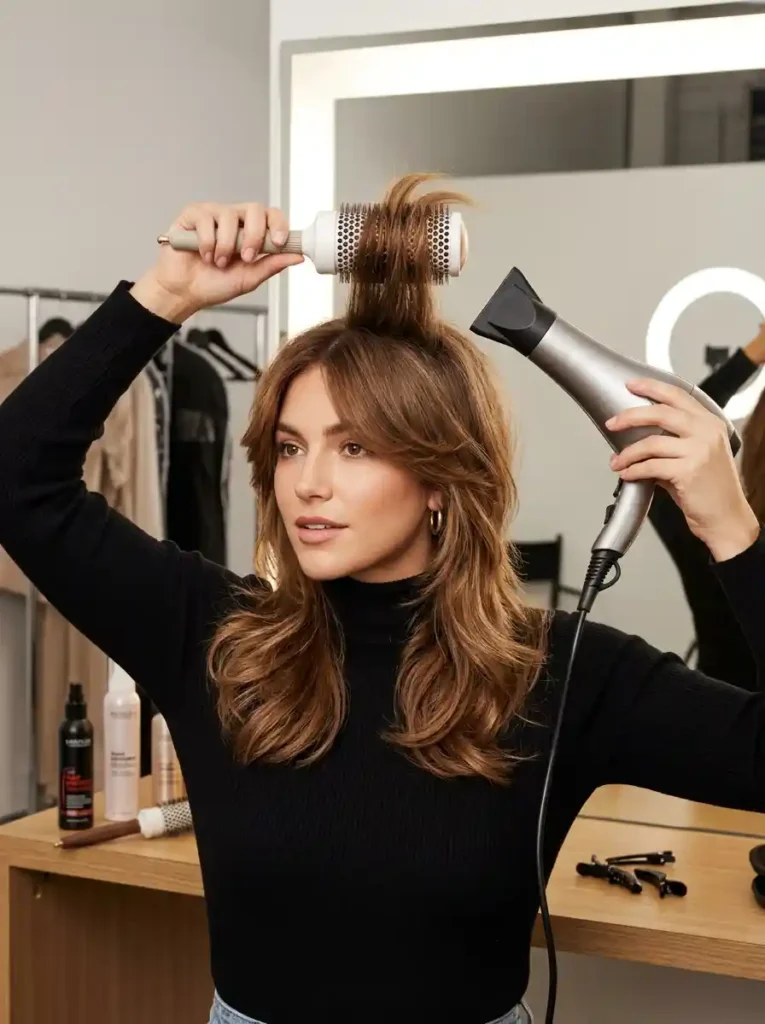
6. The Wolf Cut Styling Tutorial for Straight Hair

Straight hair creates the most technically challenging wolf cut styling scenario because the naturally smooth texture requires deliberate product and heat technique to create the volume, separation, and textural energy that the wolf cut’s structure demands. The solution is a two-part approach: first, apply a volumizing mousse or texturizing foam generously through all sections of damp hair from roots to ends, then diffuse dry with the head fully inverted over the diffuser to build maximum root lift and crown volume that straight hair naturally lacks. This specific technique creates the volume foundation that straight hair needs to express the wolf cut’s dramatic crown silhouette.
After diffusing, flip the hair back and separate the crown layers manually with your fingertips, working from the root outward to maximize each layer’s individual definition and textural presence. Apply a small amount of texturizing paste or matte wax specifically through the crown sections to create permanent piece separation that lasts throughout the day. Finish with a light hold hairspray applied from approximately thirty centimeters distance to preserve the volume without flattening it. The complete styling routine for straight hair wolf cuts takes approximately fifteen to twenty minutes but creates a result of genuine textural drama that completely transforms straight hair’s natural limitations into the wolf cut’s specific visual strength.
7. The Wolf Cut Tutorial for Thick Hair
Thick hair is the wolf cut’s single most ideal natural hair type because its existing volume and density amplify the cut’s dramatic layered structure into genuinely spectacular results that finer hair types require more styling effort to achieve. The wolf cut’s extreme layering also serves thick hair beautifully from a functional perspective — the short crown layers and graduated disconnected lengths remove significant weight from the hair’s heaviest sections, reducing the oppressive heaviness that thick hair without sufficient layering often creates and allowing the hair to move, behave, and style with significantly more ease than thick hair with minimal layering.
The specific stylist guidance worth providing when booking a wolf cut appointment with naturally thick hair is requesting that the stylist point-cut or razor-cut through the ends of all layers rather than leaving blunt ends that create a puffy, round, undefined layered result. Point-cutting through the ends of thick hair layers creates the specific textural definition and the deliberate piece separation that makes the wolf cut’s individual layers visible and structurally distinct rather than merging into a single heavy curtain of hair. This technical detail is the difference between a wolf cut on thick hair that looks genuinely excellent and one that simply looks like a heavily layered cut.
8. The Wavy Wolf Cut Tutorial
Naturally wavy hair creates the most organically perfect wolf cut expression available — the existing wave texture working in genuine harmony with the extreme layering to create a result of such natural beauty and such effortless textural energy that minimal styling intervention is needed for genuinely excellent daily results. The wolf cut’s layers give wavy hair the specific structural freedom to express its full wave potential without the weight that long, under-layered wavy hair accumulates through its length suppressing the natural wave pattern into limp, undefined waves that bear no resemblance to what the hair could genuinely do with correct structural support.
The styling routine for a naturally wavy wolf cut focuses on enhancing and defining the natural wave rather than creating artificial texture with heat tools. Apply a small amount of wave-enhancing curl cream through towel-dried hair, scrunch upward through all sections to encourage wave formation, and diffuse dry with medium heat using a wide diffuser attachment to avoid disrupting the wave pattern through the airflow. Allow the crown section to dry with the head tilted forward to maximize the short layer volume, then gently shake the crown sections once dry to create the deliberately disheveled separation that completes the wolf cut’s characteristic silhouette without any additional product.
9. The Wolf Cut for Fine Hair
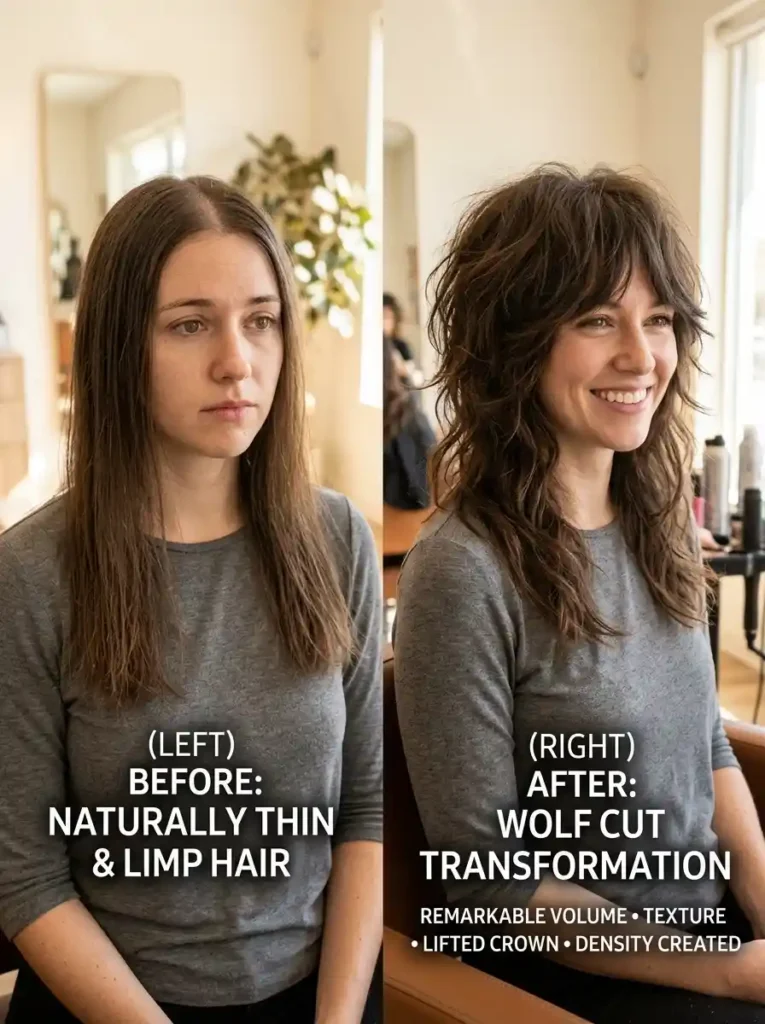
Fine hair is possibly the most genuinely transformed hair type by the wolf cut — the extreme layering removing the weight that makes fine hair lie flat and lifeless and replacing it with a structural lightness that allows fine hair to lift, separate, and create genuine volume at the crown that no amount of styling product can create on un-layered fine hair. The short crown layers of the wolf cut create specific visual bulk at the top of the head that makes fine hair appear significantly thicker and more voluminous than its actual density, while the lighter, airier lengths below move with a beautiful effortlessness that heavy, un-layered fine hair cannot achieve.
The specific product routine that creates the best wolf cut results on fine hair uses volumizing products applied strategically rather than generously — too much product on fine hair adds weight that immediately cancels the volume that the wolf cut’s structure creates. Apply a small amount of volumizing mousse specifically to the root of the crown sections before blow-drying with a round brush, lifting the root of each crown section away from the scalp as you dry for maximum root lift. Avoid applying any product to the mid-lengths and ends as these sections on fine hair benefit from being completely free of product weight to create the light, airy movement the wolf cut requires.
10. The Wolf Cut Half-Up Styling Tutorial
The half-up wolf cut styling using a claw clip through the crown layers creates one of the most effortlessly stylish and the most practically useful wolf cut styling variations available — the specific structural character of the wolf cut’s short crown layers creating beautiful wispy escaped pieces around the claw clip that make the half-up style appear deliberately artistic rather than simply pulled back. The claw clip half-up works particularly well for wolf cut wearers on busy content creation schedules or productive work from home days when the hair needs to be practically managed while still looking genuinely intentional and genuinely styled.
The technique for the most beautiful claw clip half-up on a wolf cut involves gathering only the crown layers — not the face-framing sections or the lower lengths — into a loosely structured section before clipping. Allow at least four to six individual pieces to escape the clip around the face and at the nape of the clip, as these deliberate wisps create the styling’s organic, effortless quality. The lower lengths fall completely free below the clip, creating a beautiful combination of gathered crown volume and flowing lower length that shows the wolf cut’s complete structural range within a single simple styling variation.
11. The Wolf Cut With Space Buns Tutorial
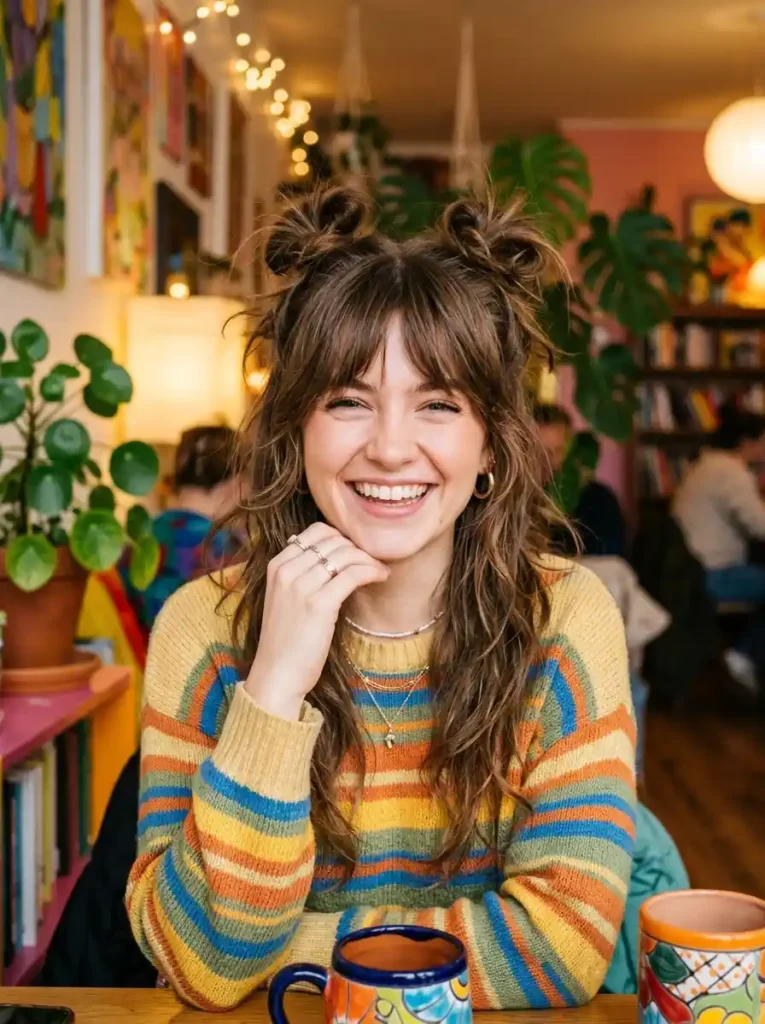
Wolf cut space buns are the most playfully expressive and the most genuinely fun styling variation available for wolf cuts with sufficient crown layer length to gather into buns — the short, textured crown layers creating naturally messy, organically imperfect space buns that are filled with wispy escaped pieces and deliberate texture that smooth-haired space buns cannot create with the same organic disheveled charm. The wolf cut’s inherent textural energy amplifies the space bun aesthetic beautifully, creating a style that looks like it took five minutes regardless of actual styling effort because the cut’s natural character makes any gathered style appear effortlessly creative.
Divide the crown sections of the wolf cut into two equal parts with a center part from the front hairline to the crown, gathering each half into a small, loosely structured bun secured with a small elastic. The key is not to smooth or slick the sections before twisting them into the bun — allowing the natural texture and the natural piece separation of the wolf cut’s crown layers to remain fully present within the bun creates the deliberate messy quality that makes wolf cut space buns so distinctively beautiful. Pull multiple pieces out from around each bun deliberately, including the face-framing sections that should remain completely free around the face.
12. The Wolf Cut Air-Dry Tutorial

Air-drying a wolf cut is the most genuinely effortless and the most naturally beautiful wolf cut styling approach available — the specific structure of the wolf cut’s extreme layering working so effectively with most hair types’ natural texture that heat tool intervention is actually unnecessary for excellent daily results in most cases. The wolf cut was specifically designed as a haircut that looks better with slightly disheveled, naturally dried texture than with precision-styled, heat-smoothed finish, which means air-drying is not a compromise of the styling potential but the most authentic expression of what the wolf cut is specifically intended to achieve.
The air-dry wolf cut routine begins immediately after towel-drying — apply a lightweight mousse or a curl-enhancing cream through all sections while the hair is still very wet, scrunching upward through the lengths rather than smoothing downward, then flip the head forward and allow the hair to hang naturally while drying, occasionally scrunching upward through the crown sections to encourage volume formation. Avoid touching the hair while it dries as touching during the drying process creates frizz and disrupts the natural wave or texture formation. Once completely dry, shake gently at the roots for volume and separate any crown sections that need definition with fingertips.
13. The Wolf Cut Blowout Tutorial
A blowout-styled wolf cut creates the most polished and the most editorially beautiful version of the wolf cut available — the round brush technique lifting and curving each crown layer section away from the scalp before directing the lengths into smooth, bouncy movement that creates a dramatically high-volume, controlled wolf cut aesthetic that reads as genuinely sophisticated and genuinely styled. The blowout wolf cut is the version to choose for professional photography sessions, important personal branding content, or any occasion where the wolf cut’s natural dishevelment needs to be refined toward something more deliberately beautiful without losing its essential structural energy.
Begin the blowout with the wolf cut’s crown layers — these are the sections that most determine the final result’s success. Take one-centimeter subsections through the crown layers, wrap each around a large round brush, and roll the brush toward the scalp while directing the blow dryer’s airflow down the hair shaft for maximum smoothness and maximum root lift simultaneously. Once all crown sections are blown out with full volume and smoothness, move to the face-framing sections and lengths, using the round brush to direct them into outward movement away from the face. The complete blowout creates a wolf cut of extraordinary polished volume.
14. The Wolf Cut Tutorial for Medium-Length Hair

A medium-length wolf cut at collarbone length creates the most practically versatile and the most broadly suitable version of the wolf cut available — the collarbone-length outer perimeter providing sufficient length for updos, braids, and half-up styling variations while the extreme crown layering delivers the full structural drama and textural energy of the wolf cut without the time and product requirements of maintaining a longer wolf cut’s complete length. The medium wolf cut is the ideal choice for anyone who wants the wolf cut’s specific visual impact within a format that genuinely suits multiple lifestyle contexts from casual to professional.
Styling the collarbone-length wolf cut benefits from the medium length’s natural ability to hold shape and texture more easily than longer lengths, because the outer perimeter’s collarbone-level weight creates a natural boundary that keeps the wolf cut’s structural contrast clearly visible without the layers at crown level becoming too grown-out before the next appointment. Refresh medium wolf cut styling on day two and three hair by applying a small amount of dry texture spray through the crown sections and scrunching lightly to re-activate any flattened texture, then re-separating individual crown layer pieces with the fingertips for a refreshed wolf cut silhouette with minimal effort.
15. The DIY Wolf Cut Tutorial at Home
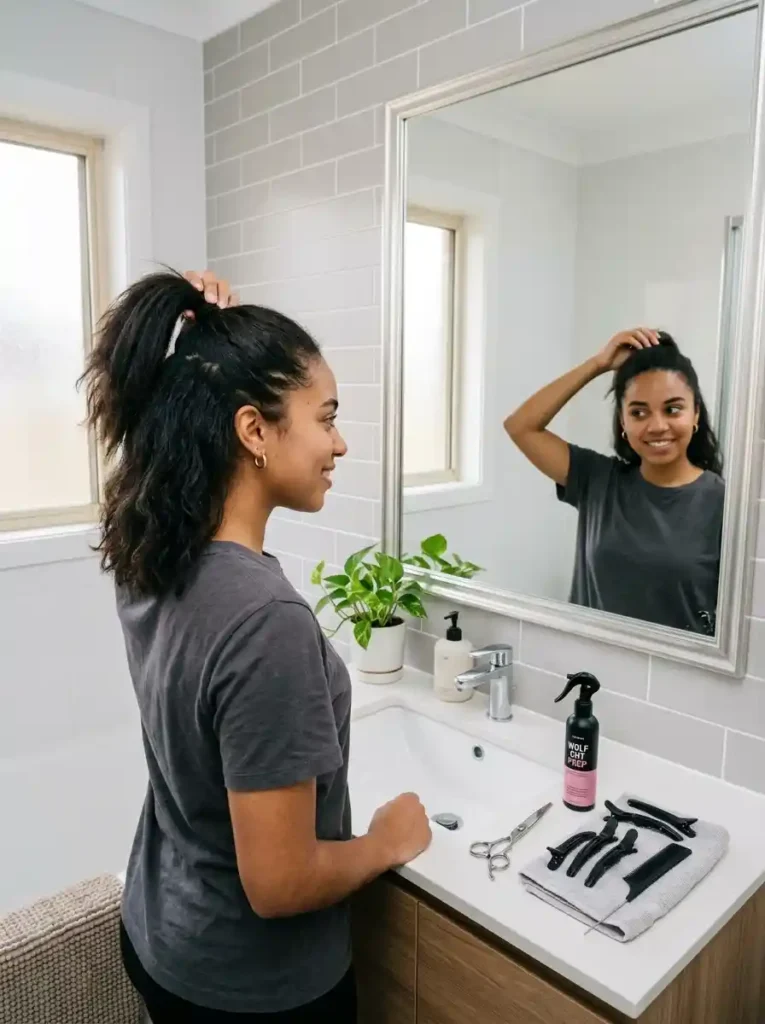
The most accessible DIY wolf cut technique for at-home cutting uses the high ponytail method — gathering the crown sections into a high ponytail at the very top of the head and cutting across the gathered ponytail at a specific length to create the choppy, varied crown layers that define the wolf cut’s silhouette. The specific distance from the base of the ponytail at which you cut determines the length of the crown layers — cutting three to four centimeters from the base creates shorter, more dramatic crown layers while cutting six to eight centimeters creates longer, more subtle crown layers. The method creates natural variation in layer length that mimics professional layering.
The essential safety considerations for a DIY wolf cut attempt include starting with longer cuts than your intended final result — you can always cut more but cannot reattach cut hair if you remove too much. Use sharp hair-cutting scissors rather than household scissors, which crush rather than cut the hair shaft and create uneven, damaged ends. Work on completely dry, naturally styled hair rather than wet hair, because dry hair shows the actual result of each cut immediately rather than the wet result that can look dramatically different once dry. If in doubt about any step, photograph your progress and consult an online wolf cut tutorial video before proceeding.
16. The Wolf Cut Color Tutorial With Curtain Bang Highlight
Adding face-framing highlights specifically through the curtain bang sections and the front face-framing wolf layers creates the most impactful color enhancement available for wolf cuts — positioning the lightened sections exactly where they most amplify the wolf cut’s structural face-framing impact and most clearly define the curtain bang sections as a separate, specially considered element of the complete haircut. The color and cut combination creates a genuinely multi-layered aesthetic investment that reads as more individually considered and more completely personal than either the wolf cut or the highlights would achieve in isolation.
The face-framing highlight placement for a wolf cut with curtain bangs should cover the curtain bang sections from root to tip, the two most prominent face-framing wolf layers on each side, and ideally one or two additional face-framing sections positioned just behind those front layers for dimensional color depth. The highlights should be lightened to a warm honey or caramel tone rather than a very pale blonde to create natural-looking warmth rather than an obviously colored result. A skilled colorist can complete this targeted face-framing highlight service in a single appointment, often at lower cost than full-head highlighting because of the limited sections involved.
17. The Wolf Cut Tutorial for Older Women
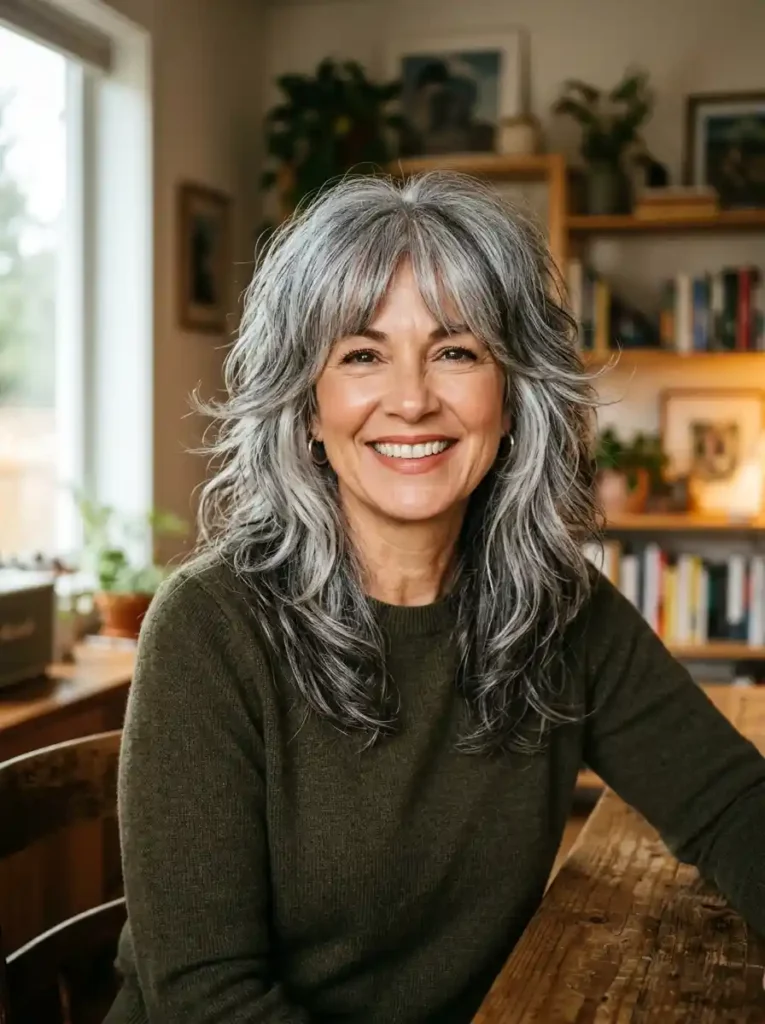
The wolf cut on mature hair — including naturally transitioning silver or grey hair — creates one of the most genuinely age-appropriate and the most volumetrically beneficial haircut results available, because the extreme layering adds the specific structural volume and dimensional movement that naturally thinning mature hair most genuinely needs while the wolf cut’s organic, slightly disheveled aesthetic avoids the overly coiffed or formally structured appearance that many hairstyles intended for older women create. The wolf cut on silver hair specifically creates extraordinary natural color contrast throughout the layered structure as different light and dark sections appear through the layers.
The wolf cut for mature hair should ideally use a slightly less extreme crown-to-length disconnection than the most dramatic wolf cuts created for younger clients — a crown layer length of approximately ten to fifteen centimeters rather than the five to eight centimeters of the most dramatic versions creates a wolf cut of genuine structural boldness without the very short crown sections that can emphasize rather than minimize scalp visibility in areas of thinning. A skilled stylist with experience in mature hair cutting will adjust the wolf cut’s proportions instinctively to create the most flattering result for each specific client’s hair density and scalp visibility needs.
18. The Wolf Cut Night-Out Styling Tutorial
The night-out wolf cut styling creates the most glamorous and the most deliberately impressive version of the wolf cut available — taking the haircut’s inherent textural energy and elevating it through strategic product placement and heat styling toward something genuinely extraordinary for occasions when the hair needs to look its most completely beautiful and its most obviously considered. Begin with a small amount of pomade worked through the crown sections to create maximum definition and permanent piece separation that lasts through the evening, then use a medium curling iron to add loose, bouncy movement to the face-framing sections and the longer lengths.
Finishing the night-out wolf cut styling requires a medium-hold hairspray applied in a continuous, sweeping motion from thirty centimeters distance rather than the heavy direct spraying that creates stiff, unnatural results. The goal is preserving the styling’s specific textural definition and movement without creating the rigid, helmet-like quality that over-application creates. A small amount of lightweight shine serum applied through the outer layers of the lengths adds the reflective luminosity that distinguishes evening hair from everyday hair. The complete evening styling process typically takes twenty to thirty minutes but creates a wolf cut result of such complete beautiful energy that the time investment is completely justified.
19. The Wolf Cut Tutorial for Thin Hair
Thin hair benefits from the wolf cut for the same structural reasons that fine hair does, but with the additional consideration that low-density hair needs the specific visual mass creation of the wolf cut’s crown layers to create the illusion of a fuller, more voluminous head of hair. The short, separated crown layers of the wolf cut create visual mass at the scalp level that genuinely makes thin hair appear thicker from every viewing angle, while the lighter, airier lengths below move with the effortless ease of hair that is no longer weighed down by the accumulated length of an un-layered or minimally layered style.
The specific stylist guidance for thin hair wolf cuts is requesting that the crown layers be cut to create maximum individual piece visibility — thin hair’s low density means each individual crown layer needs to be clearly defined and clearly separated from its neighbors to create the visual mass that makes the wolf cut work for this hair type. Ask for point-cutting or razor-cutting through the ends of all crown layers to create textural definition in each individual section. Use a volumizing root spray specifically applied to the root of the crown sections before blow-drying for the maximum root lift that thin hair needs to fully express the wolf cut’s intended high-volume crown silhouette.
20. The Wolf Cut Braid Tutorial
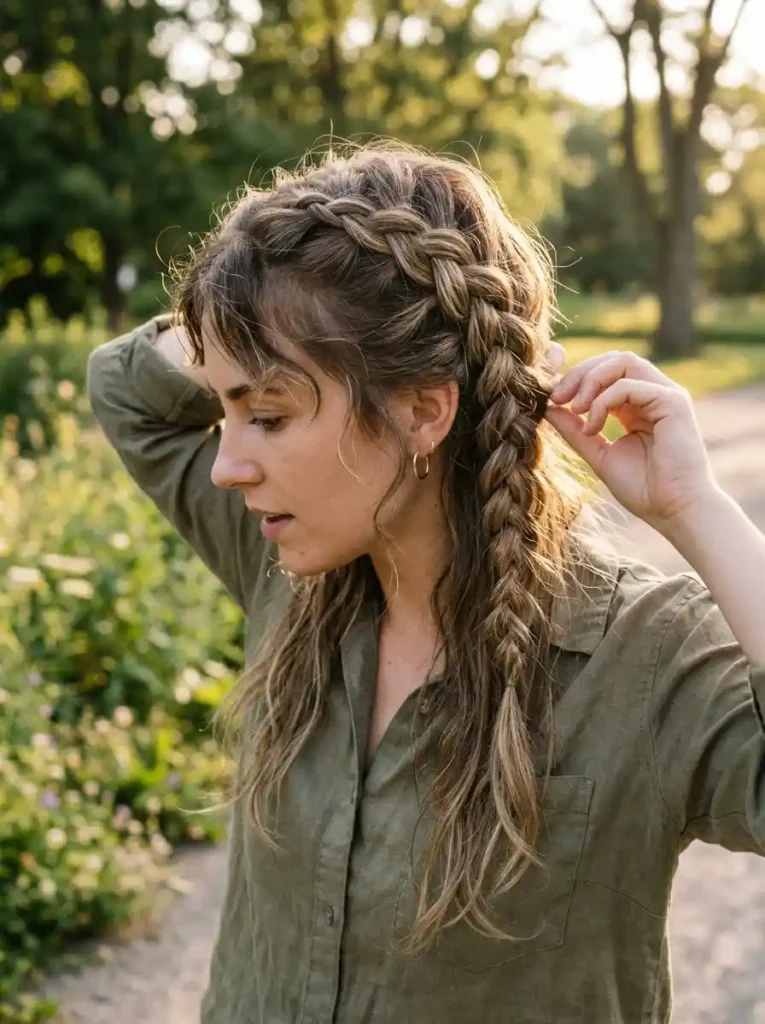
A loose, textured French braid incorporating the wolf cut’s short crown layers creates one of the most genuinely creative and the most visually interesting styling variations available for wolf cuts — the short layers creating beautiful wispy escaped pieces throughout the braid’s length that add the organic, disheveled quality to the braided style that makes it feel specifically suited to the wolf cut’s inherent aesthetic rather than simply a generic braid applied to layered hair. The wolf cut braid looks deliberately imprecise in the most beautiful possible way because the short layers literally cannot be fully incorporated, creating natural escapes that enhance the style.
Begin the French braid at the very top of the crown, incorporating the shortest crown layers first as the braid’s foundation rows — these short sections will naturally be loose and slightly messy within the braid, which is aesthetically perfect for this specific styling approach. Continue braiding down through the gradually longer layers, ending the formal braid at the nape of the neck where the lengths become too long to incorporate cleanly, and securing with a small elastic. Allow the remaining lengths to fall freely or loosely tuck them into the braid’s tail for a completely gathered result. Pull individual pieces from the braid’s edges deliberately for the most organically beautiful final result.
21. The Wolf Cut With Bangs Tutorial
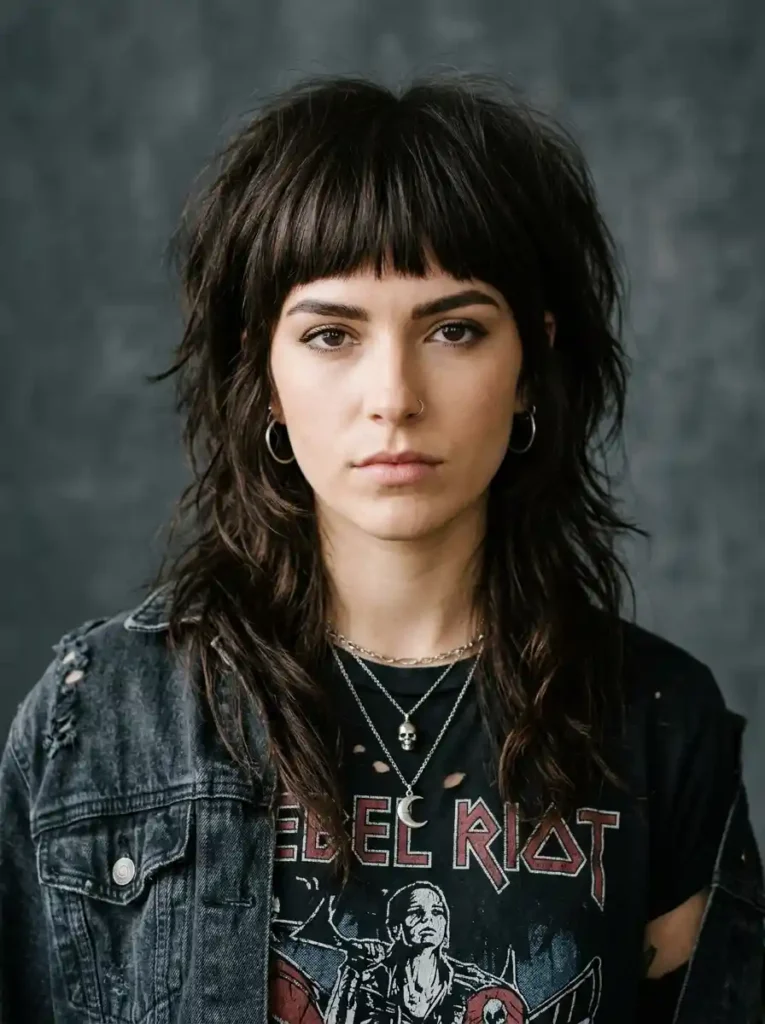
A wolf cut with a full fringe — specifically a slightly textured, not blunt, straight-across fringe cut to just above the eyebrow level — creates the most structurally bold and the most completely face-framing wolf cut variation available, combining the wolf cut’s dramatic crown-to-length disconnection with the immediate facial definition that a full fringe provides. The fringe anchors the wolf cut’s otherwise wild, directionally free structure at the front hairline, creating a specific geometric front boundary that makes the crown layers’ disheveled energy appear even more deliberately bold by contrast with the fringe’s defined straight edge.
The fringe management on a wolf cut requires the most daily attention of any wolf cut element because fringe styling is the first thing encountered each morning and the element that most immediately communicates whether the overall look is polished or neglected. A small amount of fringe-specific styling product — a light hold cream or a tiny amount of pomade — applied through slightly damp fringe and smoothed into shape before allowing to air dry creates the specific gentle hold that maintains the fringe’s shape through a complete day without creating stiffness. Keep a small amount of dry shampoo specifically for the fringe to freshen between washing days.
22. The Wolf Cut Texture Spray Tutorial
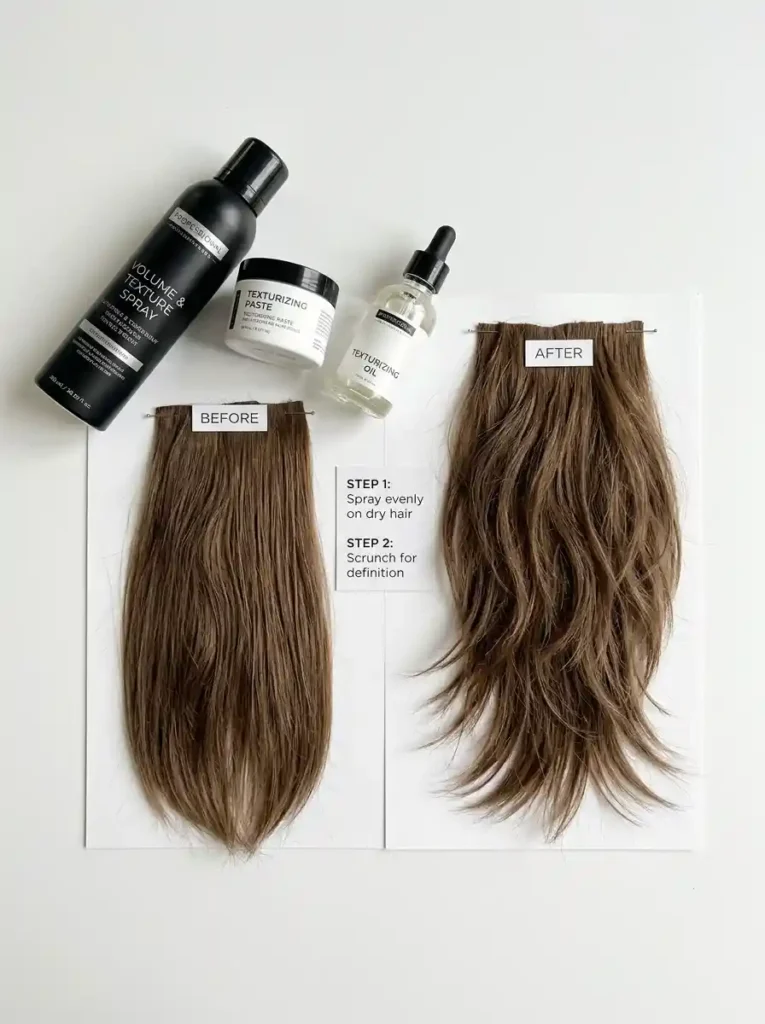
Texture spray is the single most important product in any wolf cut styling kit because it creates the specific piece separation, the tactile definition, and the visual textural energy that transforms the wolf cut from a well-cut hairstyle into a genuinely bold, structurally dramatic statement. Apply texture spray to completely dry hair through the crown sections specifically — holding the can approximately twenty centimeters from the hair and spraying in short, directional bursts through each crown layer section rather than in a continuous overall spray that distributes the product too evenly and creates less definition.
After applying texture spray through the crown, work through each section manually with the fingertips, separating individual layers from each other and working the product through from the root to the mid-shaft of each section. This manual separation after product application creates the most defined and the most visually spectacular piece separation available in wolf cut styling, because the combination of product and manual technique creates definition that product alone or manual technique alone cannot achieve with the same quality. Avoid applying texture spray through the lower lengths as the lower sections of a wolf cut benefit from smoothness and movement rather than the textural definition that the crown requires.
23. The Wolf Cut Updo Tutorial

The wolf cut updo requires creative problem-solving because the shortest crown layers — often only five to ten centimeters — cannot be gathered into a conventional updo without creating an unpleasant puffy section at the crown. The elegant solution is embracing these short sections as a deliberate textural halo around the gathered updo rather than attempting to fight them into the gathered section. Gather only the lengths that are genuinely long enough to reach the gathering point — typically from the ear level downward — into the updo, allowing the shorter crown layers to remain completely free around the crown.
The resulting updo with a textured crown halo creates one of the most genuinely distinctive and the most creatively beautiful wolf cut styling variations available — the combination of gathered lower lengths and deliberately free short crown layers creating an updo silhouette that is completely unique to wolf cut wearers and impossible to achieve with any other haircut structure. Secure the gathered lower lengths into a loose, textured bun or chignon and arrange the free crown layers with the fingertips into a deliberately beautiful halo of textural pieces. The deliberately imperfect quality of the wolf cut updo is not a styling failure — it is the style’s most specific, most beautiful, and most genuinely wolf cut-authentic quality.
24. The Most Personal Wolf Cut Tutorial
The most genuinely excellent wolf cut of all is the one specifically adapted to the specific individual receiving it — the specific crown layer length calibrated to their specific face shape, the specific fringe or bang option chosen based on their specific forehead and brow structure, and the specific length of the outer perimeter chosen based on their specific lifestyle requirements and styling capability. No two genuinely excellent wolf cuts are identical because the wolf cut’s structure is a starting framework that skilled stylists adapt with genuine individual intelligence rather than apply as a fixed formula regardless of the specific person in the chair.
Building your most genuinely personal wolf cut begins with the most honest conversation possible with the most skilled wolf cut specialist you can find — describing your specific hair type and its natural behavior, your specific daily styling time availability, your specific aesthetic vision for your hair, and your specific face shape concerns. Bring multiple saved images of wolf cuts that specifically resonate with you and be prepared to discuss what specifically you love about each image. The conversation that precedes the cut is as important as the cut itself, and the most skilled stylists use it as an opportunity to create something genuinely, specifically, irreplaceably yours.
FAQ: Easy Wolf Cut Tutorial Ideas for a Trendy Look
What exactly is a wolf cut and what makes it different from a shag? A wolf cut combines elements of the 1970s shag haircut with the mullet’s crown-to-length disconnection, creating a haircut with extremely short, choppy crown layers that contrast dramatically with significantly longer lengths below. A traditional shag has more graduated, evenly distributed layers throughout with less extreme crown-to-length contrast. The wolf cut’s defining feature is its dramatic disconnection between the short crown section and the long lengths, creating a more extreme and more visually striking silhouette than the shag’s more graduated approach.
What hair types suit the wolf cut best? Wavy and naturally textured hair types create the most effortlessly beautiful wolf cut results because their natural texture amplifies the cut’s extreme layering into genuinely spectacular organic dimension. Thick hair creates extraordinary natural volume within the wolf cut’s structure. Fine and straight hair achieve excellent wolf cut results with the correct styling techniques but require more product and heat tool support to create the volume and texture that thicker and wavier hair types deliver naturally.
How do I style a wolf cut every day without spending too much time? The most efficient daily wolf cut styling routine uses a texturizing spray through the crown sections and manual finger separation of the crown layers, taking approximately three to five minutes. For wavy and naturally textured hair, scrunching with a small amount of curl cream and air drying requires zero heat tool time. The wolf cut specifically improves with slightly disheveled, naturally dried texture, which means the less styling effort applied, the more authentically wolf cut the result often appears.
How often does a wolf cut need maintenance appointments? The wolf cut requires maintenance appointments every six to eight weeks to maintain the structural relationship between the crown layers and the outer perimeter that creates the wolf cut’s specific silhouette. Without regular maintenance, the crown layers grow toward the outer perimeter’s length, losing the dramatic disconnection that defines the wolf cut’s character. The crown sections grow faster than the outer lengths in most people’s experience, which means the wolf cut loses its specific shape more quickly than longer, less structured haircuts.
Can I do a wolf cut myself at home? The basic wolf cut structure can be attempted at home using the high ponytail cutting method for the crown layers, but professional results are significantly more reliable than most home attempts for this specific cut because the crown layer proportions require experienced eye for balance and the blending between the crown and the lengths requires technical skill. If attempting at home, research specific wolf cut tutorial videos for your hair type, start with longer cuts than you intend, and work in small increments rather than removing large amounts of hair at once.
What face shapes suit the wolf cut? The wolf cut suits oval and heart face shapes most naturally because the face-framing layers and crown volume create complementary proportion for these specific structures. Round and square face shapes benefit from a wolf cut with curtain bangs that create vertical visual length through the center of the face. Long face shapes benefit from wolf cuts with shorter crown layers and more horizontal face-framing sections that create visual width rather than length. Almost every face shape can wear a wolf cut with appropriate proportional adjustments from a skilled stylist.
What products work best for styling a wolf cut? Texturizing spray is the most universally essential wolf cut product for creating the piece separation and tactile definition that the wolf cut requires. Volumizing mousse applied to damp crown sections before drying creates lasting root lift. A lightweight curl cream or wave enhancer applied to damp hair throughout all sections creates natural-looking texture on straight and slightly wavy hair. A small amount of pomade or matte wax worked through dry crown sections creates permanent piece definition for editorial or evening styling. Avoid heavy serums or oils through the crown sections as these add weight that flattens the volume the wolf cut requires.
Conclusion: Your Most Confident Wolf Cut Starts With the Right Idea and the Right Stylist
Every wolf cut tutorial idea in this guide shares a single foundational quality: it treats the wolf cut’s extreme structural disconnection as the starting point rather than the finished product — a framework that skilled stylists adapt and skilled wearers personalize through their specific hair type, their specific styling routine, and their specific personal aesthetic vision. The wolf cut that looks genuinely extraordinary on you is not the most extreme version or the most popular version — it is the version specifically calibrated to your hair’s natural behavior, your face’s specific structure, and your daily life’s honest styling capacity.
The path to your most genuine and most confident wolf cut begins with saving the specific images from this guide that create the most authentic personal response, booking with a stylist who has a demonstrable portfolio of beautiful wolf cuts on hair types similar to yours, and having the most honest conversation possible about what you want and what your hair can genuinely do. Every other decision flows naturally from that specific, personal, honest starting point.
Save this guide before your next hair appointment. Share it with a friend who has been considering the wolf cut but has not yet found the specific version that feels completely right for them. Choose the tutorial or variation that resonates most genuinely with your personal vision and bring it confidently to your next consultation.
Which of these twenty-four wolf cut ideas feels most like the version that is specifically, completely, and genuinely yours?


